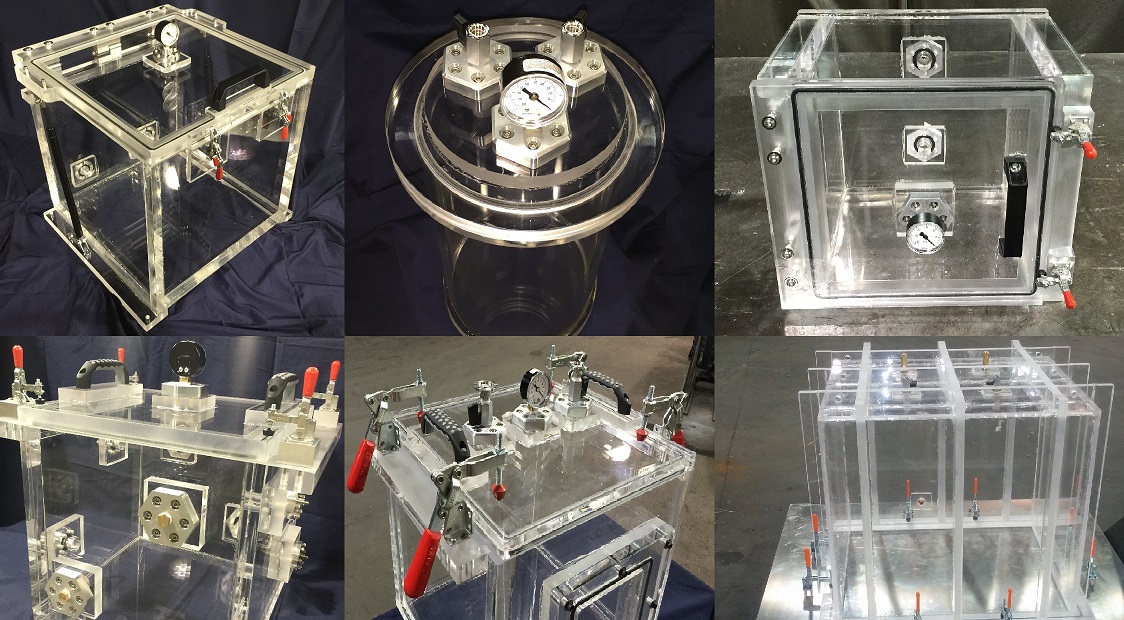
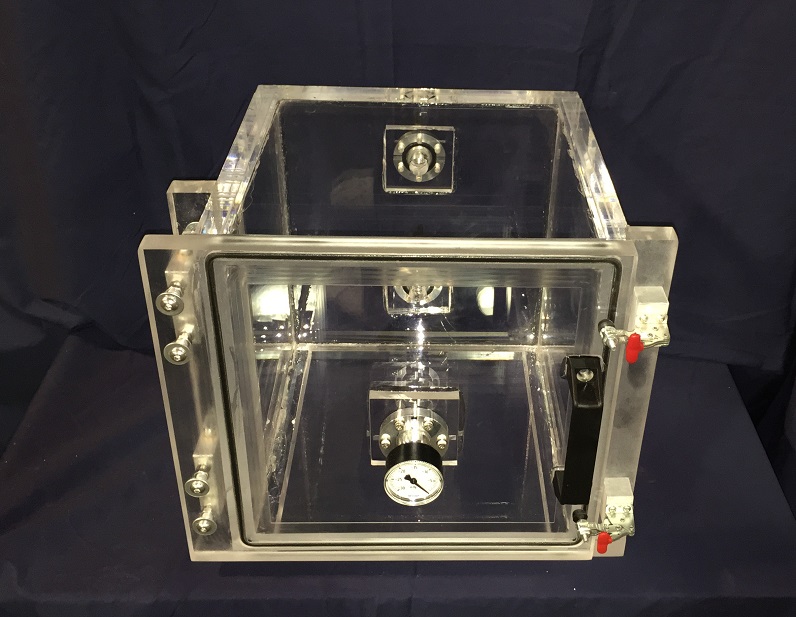
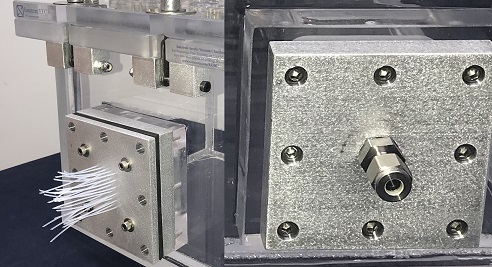
An Acrylic Vacuum Chamber can be used to simulate elevation very reliably to altitudes up to 60.9 km or 200,000 feet. This provides several advantages over other testing methods as acrylic is transparent and enables full view of interior during testing. In this article, we will give you a through guide on what can be done to eliminate the risk of packaging damage during shipments at high altitudes.
Altitude Simulation Test Chamber for Packaging and Shipping Studies
Air pressure is a function of elevation - the higher the altitude the lower the pressure. This is due to the fact that gravity pulls air molecules down and hence the air molecules on top push down onto the air molecules below exerting increasing pressures as elevation decreases. Conversely, the opposite is true, as altitude increases, the pressure decreases. This becomes a packaging concern because the drop in atmospheric pressure induces pressure differences between the package and the shipper resulting in shipping damage to products.
The Following Test Protocols can be successfully performed using an acrylic vac chamber:
1. ASTM D6653 / D6653M - Tests such as the Standard Test Methods for Determining the Effects of High Altitude on Packaging Systems by Vacuum Method.
2. 49 CFR 173.27 - General requirements for transportation by aircraft.
3. Basic environmental testing procedures - Part 2-13: Tests - Test M: Low air pressure
4. Any other test protocol encompassing elevations up to 60.9 km or 200,000 feet.
Vacuum and Pressure Definitions
In the realm of atmosphere, pressure, and vacuum, there are few definitions:
1. Perfect Vacuum: is the absence of all air. A perfect vacuum, if such thing even exists, is the absence of air, or any molecules. There is nothing, only space.
2. Vacuum: is the absence of some air; essentially any air within the system that has a lower pressure than the gauge pressure is considered a vacuum.
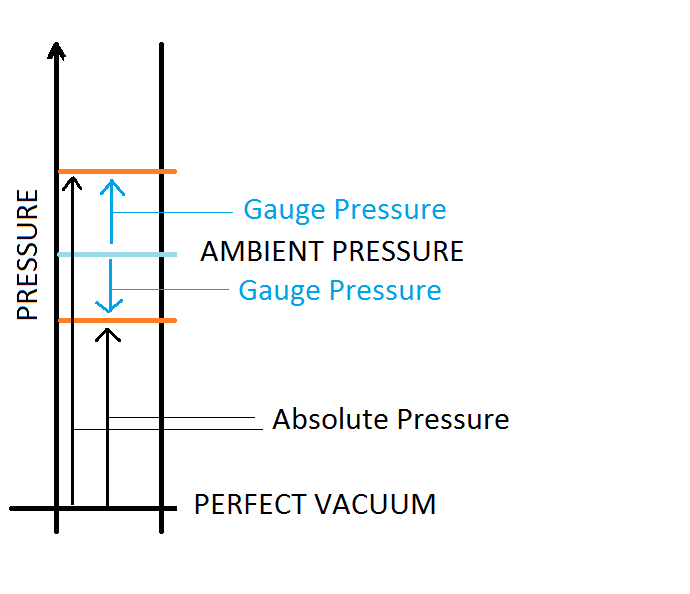
3. Gauge Pressure: is the pressure referenced to ambient pressure. This differs based on altitude.
4. Absolute Pressure: is the pressure referenced to perfect vacuum.
5. Ambient Pressure: is the pressure of the surrounding environment, this turns out to be 14.7psi at sea level or roughly 10 psi at 3100 meters.
Gauge Pressure = Absolute Pressure (Referenced to Vacuum) – Ambient Pressure (referenced to surroundings)
When Gauge Pressure is negative, we have a vacuum or lower pressure. On the other hand, when Gauge Pressure is positive, we have high pressure.
Elevation vs Absolute Pressure
As the altitude increases, the absolute pressure decreases. The fact is that the absolute pressure is always the same given the same altitude regardless where on earth (excluding pressure changes due to Temperature). This is why an absolute pressure gauge can be used to measure altitude.
High Altitude Shipments
Most packages transported over long distances, will experience a change in altitude one way or another. In the United States, ground shipments passing through the Rocky Mountains may experience altitudes as high as 3,658m or 12,000ft. On the other hand, packages transported by cargo airplanes are pressurized to altitudes of 2500m or 8,000ft. Feeder Aircrafts, which are not pressurized, operated by USPS, UPS, FedEx, and other carriers, have been recorded to fly up to elevations of 6000m or 20,000 ft.
The Federal Aviation Administration has observed that closure or seal failures in plastic and metal packages, induced by high altitude transport, accounted for 65% of all packaging failures; for glass containers, seal and closure failures accounted for 23% of all package failures.
Based on these finding, it is evident that a high altitude shipping study must be performed on all packages which will be transported by ground or air. As a consumer, these package failures can be frustrating or amusing due to spillage of products all over the place. However, that frustration is shared by the packager not in the form of amusement, but in the form of frustration realized in spilled dollars due to damaged products, customer complaints, or bad reputation. Most importantly, these package burst failures can become a real liability if the transported material is hazardous. The packager must be assured that packages, package seals, and package closures will not fail during transport at high altitudes.
Testing your packages for High Altitude Shipments
There are several test protocols and methods which appropriately test your package seals for reliability at higher elevations or low pressure environments. We will talk about three testing methods. The main goal of your high altitude test is to essentially simulate the elevation of your packages. During your package testing, a representative study must be performed where the pressure at elevation, the transit time, and the temperature must be taken into account.
Testing Method 1: Recommended High Altitude Packaging Test Protocol
Determine the extreme conditions at which your packages will be transported. For example, your packages will be transported at a temperature of 20 Degrees Celsius or 68 Degrees Fahrenheit, at a maximum Altitude of 6000m (20,000ft) for a maximum of 5 hours. In order to get a statistically significant result, a sample size of 40 to 100 samples should be selected.
Step 1: Seal, close, or package your shipments in the same way they are packaged. You want to be as close to your packaging procedure as possible.
Step 2: Let your packages settle for 24 hours in a room which is properly temperature controlled. You may want to use an temperature controlled oven. This process is known as temperature conditioning.
Step 3: Place your samples in an acrylic vacuum chamber and pull the absolute pressure vacuum equivalent of 20,000 ft.; in your example, this corresponds to 349 Torr, or 6.75psi, or 46.6 kPa, or 13.8 in Hg. Keep in mind that the Gauge Pressure and the Absolute Pressure are different as mentioned previously, we are talking about absolute pressure here.
Step 4: Once your target vacuum has been reached. Close the vacuum valve and hold that vacuum for 5 hours – may be more or less based on your requirement. It is 5 hours in our example.
Step 5: After your packages have been present inside the vacuum for your required time, release the vacuum and inspect your packages for seal, closure, or package failures.
Testing Method 2: ASTM D6653 / D6653M - Tests such as the Standard Test Methods for Determining the Effects of High Altitude on Packaging Systems by Vacuum Method.
Step 1: Select your vacuum chamber which capable of appropriately withstanding 1 atm pressure differential across the walls. The vacuum gauge must be sealed to the chamber and capable of a vacuum range from 0 to 100 kPa or 0 to 30in Hg. Click here to purchase your vacuum chamber for the ASTM D6653 test.
Step 2: Determine your sampling method which should be representative of your sample to permit adequate determination of performance. If you cannot determine a good sample size, at least 3 representative samples must be selected for performance evaluation.
Step 3: Test specimen must be conditioned to 5.6 +/- 2 Degrees Celsius for 24 hours prior to testing. Test specimens must also be tested at 5.6 +/- 2 Degrees Celsius.
Step 4: Place the Test Specimen into the Vacuum Chamber and turn the vacuum source by making the vacuum rise by 1000 ft or 305 m for every 30 to 60 seconds until the appropriate pressure/vacuum is achieved.
Step 5: Attain a pressure equivalent of 4,877 m (16,000 ft) +/- 5%; this correspond to an absolute pressure of 412 Torr, or 7.96 psi, or 56.3 kPa, or 16.22 in Hg. An elevation of 4,267m or (14,000 ft) may be aimed for if 4,877 m is not achievable or inappropriate; this corresponds to an absolute pressure of 446.53 Torr, or 8.63 psi, or 59.5 kPa.
Step 6: Maintain the achieved vacuum for 60 minutes.
Step 7: After the 60 min vacuum hold time has elapsed, release the vacuum at a rate of 1000 ft or 305 m for every 30 – 60 seconds.
Step 8: Once vacuum has been released, open the chamber, and examine your specimen for damage or deformation.
For more details, refer to: ASTM D6653 / D6653M - Tests such as the Standard Test Methods for Determining the Effects of High Altitude on Packaging Systems by Vacuum Method.
Testing Method 3: 49 CFR 173.27 - General requirements for transportation by aircraft.
Step 1: Obtain a representative packaging sample with a statistically significant sample size.
Step 2: Create a Vacuum with an internal pressure which produces 75 kPa (11 psig) or more for liquids in Packing Group III of Class 3 or Division 6.1; or 95 kPa (14 psig) for other liquids; or as per CRF requirements.
Step 3: The vacuum hold time must be representative of the transportation environment – one hour is generally a good vacuum hold time.
Step 4: After one hour has elapsed, release the vacuum, remove the packages, and inspect for failures such as torn seals, leaks, etc..
For more details, refer to: 49 CFR 173.27 - General requirements for transportation by aircraft.
Conclusion
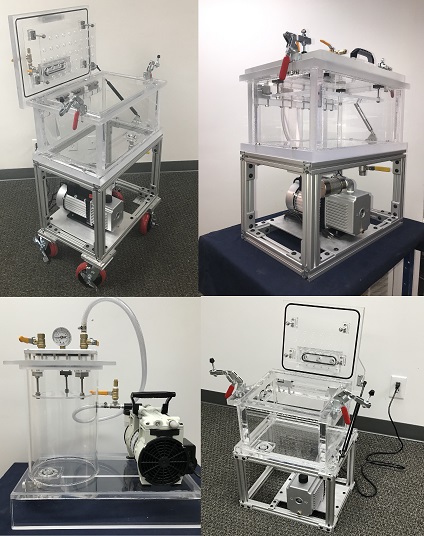
It is the responsibility of the packager to ensure that the package arrives at the final destination undamaged. One of the easiest ways to ensure that fact is to simulate the environment the package will undergo during shipments. An acrylic vacuum chamber can easily reproduce the pressures at higher altitudes during transport and hence ensure that your package will travel safely.We have many more resources on our website that you should check out
Our clients prefer to work with us because we are Experts in Vacuum Science and Technology. There is a tremendous amount of valuable resources and information regarding vacuum systems and vacuum technology; check them out by clicking on the links below.

Complete List of Articles Related to Acrylic Vacuum Chambers