Bubble testing is a simple yet powerful technique for detecting leaks in sealed systems and components. Also known as bubble leak testing or the bubble emission test, this method relies on visual clues, the formation of bubbles, to reveal any unwanted openings in a product. It’s a time-honored approach used across a variety of industries to check everything from spacecraft components to food packaging for integrity. In an era of high-tech sensors and spectrometers, the humble bubble test remains a straightforward, cost-effective way to ensure that what’s meant to be sealed stays sealed. This general overview will explain how bubble leak tests work, why they are employed, and how different fields like aerospace, automotive, medical manufacturing, food packaging, HVAC, and industrial engineering put this technique into practice.
This will cover the absolute basics of bubble testing and how it can be applied to all projects across industries.
How Bubble Leak Testing Works
If you have ever had a flat bicycle tire and have tried to fix it, you most likely inflated the tire and placed it into a bucket of water and looked for bubbles. That is, at its core, what a bubble test is.
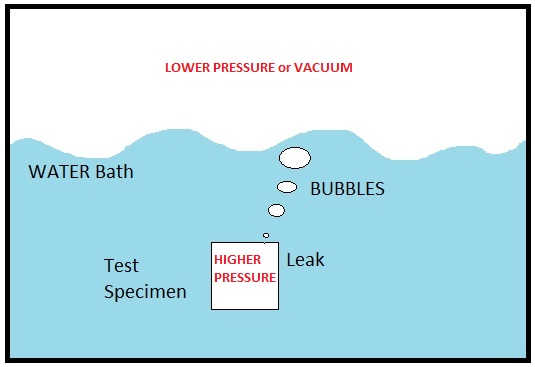
Bubble leak testing operates on a very intuitive principle: if gas is escaping from a pressurized object and you surround it with liquid, the gas will form bubbles at the leak site. By observing these bubbles, one can both detect the presence of a leak and often pinpoint its location. The simplicity of this concept makes bubble testing accessible and easy to understand for anyone.
In a typical bubble test, the item under inspection is sealed and then filled with a low-pressure gas (often air) to slightly above atmospheric pressure. Next, the exterior of the item is checked for leaks in one of two main ways:
Submersion Method (Dunk Testing):
The pressurized part is completely submerged in a tank of water (or other liquid). If there is a leak, streams of bubbles will emerge from the leaking spot, visibly rising through the water. This “dunk and bubble” approach is common for smaller components or sealed packages, where an operator watches for continuous bubble trails coming from any defect.
Spray or Wipe Method (Soap Solution Testing):
If dunking the part isn’t practical (for example, with very large systems or installed equipment), a soapy water or special bubble solution is applied to the outside of all seams, joints, and connections. The area is then observed closely. Any escaping gas will create frothy bubbles in the soap film at the leak point, effectively blowing a bubble to mark the leak. Technicians often use this method on pipes, fittings, or tire surfaces.
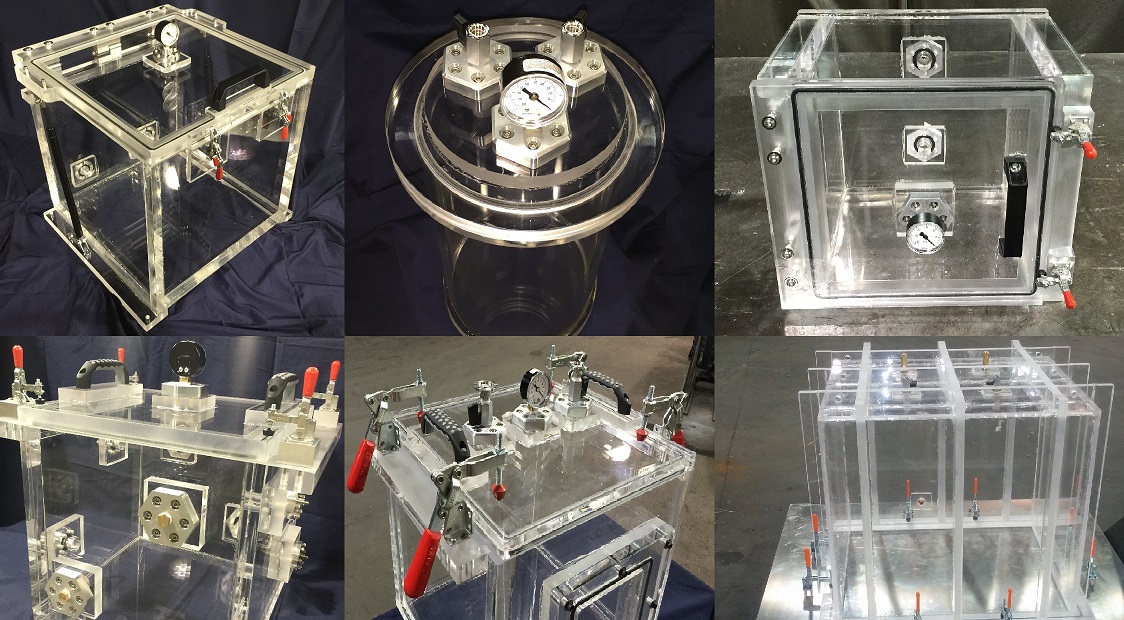
A variation for certain applications called the vacuum box technique, used when you can’t pressurize the inside of a structure. In this case, a transparent box is placed over a wetted section of the test piece and a vacuum is drawn inside the box. If there is a leak in the test piece, air from outside will be sucked through the liquid, forming bubbles inside the box. This vacuum-based bubble emission test is especially useful for things like flat weld seams on storage tank floors or pipe joints where only one side is accessible.
Another very popular variation is the so-called vacuum bubble leak testing technique, where the test specimen is sealed and applying internal pressurization via a pressure line is not the preferred method. Instead, the test specimen is submersed into a transparent vacuum chamber, vacuum is applied, and bubble leaks are observed.
It should be noted that, the pressure differential needed to drive air through the leak can be accomplished by either increasing the relative pressure inside the test specimen, or decreasing the relative pressure on the outside of the test specimen. As stated before, it is the pressure differential that will drive the air through the leak path. How this pressure differential is accomplished is test specimen dependent.

Basic Steps in a Bubble Leak Test
The first two steps depend if it is a Soap or Wipe Method or the Submersion Method.
Soap Method:
Pressurize First before Submerge
Submersion Method:
Submerge then Pressurize. An easy way to remember: If it’s the Submersion Method, Submerge first.
Pressurize the item (Create a Pressure Differential):
The component or package is sealed and filled with a gas under pressure (or evacuated, in the case of a vacuum method) to create a pressure difference between the inside and outside. The pressure used is high enough to force gas out through any leak path, but safe for the item being tested.
Apply Liquid or Submerge:
The test object is either immersed in a basin of water or coated with leak-detecting fluid (usually a water-based soap solution). This liquid forms a thin film over any openings.
1. Observe for Bubbles:
A technician watches the object’s surface (or the water around it) for any bubbles emanating from a specific spot. Patience and focus are what matters here, small leaks might produce tiny bubbles or only bubble up after a few seconds of steady gas flow.
2. Locate and Mark Leaks:
If bubbles appear, the leak location is noted. In a submersion test, one might mark the area on the part after removing it from the tank. With a soap solution, the bubbles typically cluster at the leak point, making it easy to mark directly.
3. Repair and Retest (if applicable):
In manufacturing and maintenance contexts, once leaks are found, the next step is usually to repair the defect (re-seal the package, tighten or replace the faulty part, re-weld a seam, etc.) and then repeat the test to ensure no more bubbles appear.
This process provides an immediate visual indication of leaks. A steady stream of bubbles is a clear sign of a breach, even to an untrained eye. The size and frequency of the bubbles can give a rough sense of the leak’s magnitude – for example, a rapid torrent of large bubbles suggests a major leak, whereas a slow release of tiny bubbles points to a minor pinhole leak. In many testing standards, a leak that causes continuous bubbles is considered a “gross leak,” meaning a substantial defect.
Why Use Bubble Tests? Advantages and Limitations
Bubble testing has remained popular in quality assurance for decades because of its practical benefits. It’s inexpensive (often requiring only basic equipment like a tub and air supply or a spray bottle and soap) and straightforward enough that one can learn the technique quickly. Unlike sophisticated electronic leak detectors, bubble tests don’t demand specialized training or costly machines. Versatility is another plus – the same fundamental method can be applied to diverse items ranging from a tiny medical package to a large industrial tank.
Perhaps the biggest advantage is that bubble tests not only tell you that a leak exists, they also show you exactly where it is. This pinpointing ability is extremely helpful for troubleshooting and repairs. Other testing methods, such as pressure decay measurements, might alert you to a leak but won’t identify the location; you’d still have to hunt for the leak afterward. With bubbles, the leak reveals itself in real time, which can save a lot of effort in diagnostics.
However, no method is without drawbacks. Bubble leak testing is considered a relatively qualitative or gross leak detection method. It will readily catch major leaks or holes, but extremely small leaks (those releasing very tiny volumes of gas) might not produce visible bubbles and could slip by unnoticed. In critical applications where microscopic leak-tightness is required (like certain aerospace or semiconductor components), more sensitive techniques such as helium mass spectrometry are used to detect those micro-leaks beyond the bubble test’s reach.
Another limitation is that bubble tests are often manual. The effectiveness can depend on the skill and thoroughness of the person doing the inspection. An attentive operator will methodically cover all potential leak sites and carefully watch for even the smallest bubble, whereas a less careful one might miss subtle leaks. Also, the orientation and visibility of the test area matter — if a leak is on the underside of a component or in a hidden crevice, bubbles might form where they aren’t easily seen. In the aerospace field, for example, components packed tightly in an aircraft can have leak points that are hard to view, making soap-bubble testing challenging in those spots.
Interestingly, very large leaks can sometimes fool a bubble test. If a hole is big enough, the pressurized gas may rush out so forcefully that it blows away the liquid before a bubble can form. In such cases, one might not see any bubbles even though a significant leak is present. Inspectors learn to recognize this possibility – if no bubbles form but a hissing of escaping gas is heard or the soap film is visibly pushed away, that indicates a major leak that needs attention. Additionally, using a liquid on certain systems can be problematic (for instance, soapy water on electrical or oxygen systems), and in some plants this method is prohibited for safety reasons. Care must be taken to ensure the testing fluid itself doesn’t contaminate or harm the item being tested (for example, delicate electronics or oxygen lines require special solutions that won’t leave residue or ignite).
Conclusion
In summary, bubble tests are ideal for quick, general leak checks and “gross leak” detection, offering simplicity and immediate results. But for quantifying leak rates or catching the tiniest of leaks, and for high-volume testing where automation is needed, other methods may be more appropriate. Often, manufacturers will use bubble testing as a first-line screening tool and follow up with more precise tests if necessary. With that understanding of how bubble leak tests work and what they can (and can’t) do, let’s explore how different industries utilize this technique as part of their safety and quality protocols.
Related Articles:
■
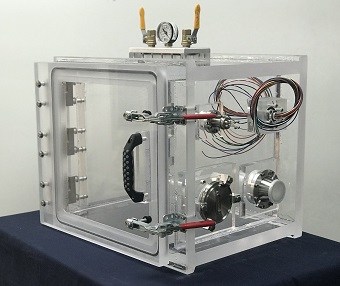
Learn More about Bubble Leak Testing Using an Acrylic Vacuum Chamber
■
Vacuum Bubble Leak Test, A Comprehensive Guide
■
Understanding Leaks and Leak Rates for Best Quality Leak Testing
Related Protocols:
■
ASTM D3078 Protocol Explained, Practical Leak Detection for Flexible Packaging
■
ASTM F2096 Protocol Examined, Detecting Gross Leaks in Packaging
Similar Items
We are an Engineering Excellence Company. You should check out some of our other items we carry; click on the links below.

Complete List of Articles Related to Acrylic Vacuum Chambers